

Fully paneled cockpit
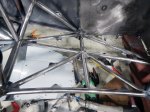
While the sides of the cockpit already have side-intrusion panels on the outside, they will also have a second panel on the inside to prevent the seat foam from extruding between the frame tubes and pushing on the outside panels, something those outside panels aren’t equipped to properly resist. The interior panels also must follow the SCCA rule against stressed skins that requires chassis attachment points to be more than 6 inches apart. Due to their different shape and size, the interior panels have a completely different mounting pattern and can’t share any of the exterior panel mount points. Thus, many more tabs are cut and welded on.
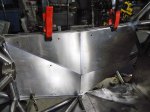
The seat back is formed by the fuel tank and three additional pieces of aluminum, shaped at the sides to provide shoulder support on the front while providing space and access at the back to the fuel pump on one side and the fuel filler on the other. The center section is removable to access the shoulder harness mounting points.
-
- Test fitting the right side cockpit panel, view from inside
-

- Left side clamped in place
-

- Separate mounting tabs for interior panels
-
- Left side mounting tabs welded in place
-
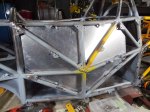
- Left side cockpit panel installed
-

- Test fitting the seatback
-

- Seat back panel had to be cut in 3 pieces; right piece shoulder panel shown
-

- Left shoulder panel provides access to fuel filler
-

- Seat back center panel with shoulder harness cutouts


