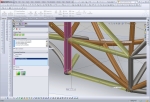
I’ve been getting requests for the dimensions of the car from around the world. This should help. Some of the aerodynamic details have changed since this 3D model was made, so don’t take this drawing too literally. If you click on the image above you’ll get a PDF file with both top and side views dimensioned and in high resolution.
Category Archives: Drawings
Building the Body Buck: Part 1, Ribs & Foam
Here’s what we’re building, sort of. Rather than build a CAD model of an actual assembly of stringer and rib parts, I extruded cuts into the solid model so that the slots will appear in the correct places when I make cross-section drawings at the appropriate locations. This is actually harder to visualize than you might think. I wasn’t sure it would go together flawlessly, especially since the cuts in both the ribs and stringers went to two different depths depending on the typical height of each region. I didn’t want long floppy sticking up from the cuts:
- Longitudinal stringer drawings printed on A0 paper and pieced together
- First we need a table to build it on…
- All cross sections cut from 3mm plywood and assembled on the table. THANKS DAVE!
- Starting the process of filling in the voids, using wadded newspaper topped with two-part foam
- Foam filling continues…
- Cut to shape with hacksaw blade, belt sander, and sandpaper
- And continues…
- And continues…
- etc.
- Filling and trimming as I go.
- Many applications left voids, which I attempted to fill with more foam.
- Using whatever is convenient to constrain the foam. Here, bungee cords hold old pillows.
- And continues…
- This foam was difficult to work with. No reaction for 30 sec., then hard in 20 more sec.
- Foaming is finished.
- Filling some voids.
- Trimming almost finished.
- Just the driver’s head fairing left to trim.
How to Fishmouth Tubes in Solidworks
After playing around with various kinds of hole cutters, mills, angle vises, and so on, I’ve settled on the best method for cutting fishmouths in tube ends so they fit together properly when building a tube frame with round tubing. Since the tubes will be welded they don’t have to be perfect as you would get by using a milling machine. Also, the typical joint has several tubes meeting which need to accomodate each other, and on a milling machine this would take a separate setup for each tube at each joint, taking an inordinate amount of time. Forcing Solidworks to show the correct shape of the ends of each tube requires some real work, an explanation of which I found over on the LoCost website. I’m going to provide a modified and updated tutorial here.
The first thing to understand is that each tube must be fully welded before adding the next tube. This makes the finished structure much stronger than if you tacked all the tubes in place and simply welded around the remaining visible joints. Here’s an example:
Solidworks Tutorial
Although the following tutorial may look long and complicated, once you understand what’s going on each step will only take seconds. And believe me, it’s much faster than grinding a tube to fit using trial and error. More accurate, too.

First, create a weldment profile with the correct outside diameter, a thickness of 0.1mm, and a gap of 0.1mm as shown.

Each tube will need to be trimmed to the tubes around it, reflecting the order in which they will be assembled. Insert > Weldment > Trim/Extend. Check your trims.

Align the views horizontally by right clicking on one view and choosing Drawing Views > Align Horizontally by Origin.

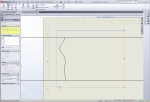
Crop each view by first drawing a rectangle with 4 lines. The automatic draw rectangle won't work because it uses the unrotated axes.

Crop the view by selecting the four lines of the rectangle, right click and choose Drawing Views > Crop View
Designing the Chassis Jigs
I had been trying to keep the chassis jigs in my head, but finally decided they’d probably come out better if I put them on paper first. So I spent the past few days designing them, and it became quite clear why I couldn’t keep them all in my head. I intend to bend the top chassis rails in one continuous curve as that will add a lot of style to the chassis. A lot of race car frames look like industrial equipment, but I have something in mind more like an Ariel Atom exoskeleton car, where the frame is so beautiful you don’t even need a body. Of course the car will have a body for aerodynamic, esthetic, and safety reasons, but I’d like people to see the frame without the body and still say “Wow!”. Now, the top rails are splines, not just arcs, and the only way to really bend one properly is to know where it’s supposed to be in 3-d space along it’s length, and that’s where the chassis jig comes in. When the chassis jigs are all in place, it will give me target locations all along the length of the frame that I can bend the rail to fit.
I eventually ended up with 22 pages of drawings that look like this:
And two pages of drawings that look like this:
Free Download: Swing Set Drawing
Just for grins, here are the plans for the children’s swing set and slide in case anyone wants to build one him/herself. Note that I specified the tubing thickness at 1.6 mm, where I built mine with 1.2mm tubing. I felt that it could benefit from being stiffened up a little more. Also not shown on the drawing is the attachment points for the swings and a set of chains up one side of the main structure that form a ladder. I’ll post a photo of the finished project later for reference.


