
Time for a photo update showing how I built the cockpit, tube by tube.
-
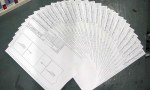
- A complete set of tube drawings for one forumula 1000 cockpit. It’s a lot of work to generate these drawings, but it saves a lot of time in fabrication, and ensures the frame is accurate
-
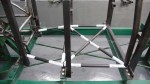
- Test fitting the tubes for the cockpit floor
-
- Now we can see the main roll hoop was fabricated too narrow. The holes on the jigs don’t line up properly with the roll hoop
-
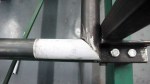
- Found the hidden stash of angle grinder shields removed by my Thai workers. In Thailand, workers just laugh at safety measures. I’ve even had one quit when I insisted he wear eye protection.
-

- Main roll hoop cut and bent to proper size. Sigh…
-

- Test fitting the revised roll hoop
-
- A new bottom member was fabricated for the main roll hoop
-

- Tack welding the revised main roll hoop
-

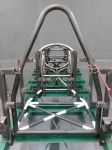
- Once again test fitting the main roll hoop
-

- Main roll hoop fully welded. Looks much better.
-
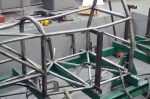
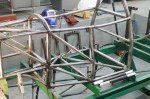
- Four outside cockpit frame rails in place
-

- Left side vertical tube in place
-
- Left front lower diagonal in place
-
- Left front middle horizontal and upper diagonal tubes in place
-
- Right side vertical in place
-
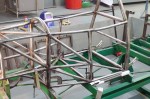
- Right front lower diagonal and middle horizontal tubes in place
-

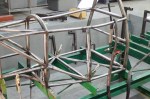
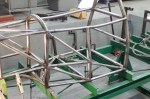
- Left rear lower diagonal tube in place
-

- Right rear lower diagonal tube in place
-
- Two rear middle horizontal tubes in place
-

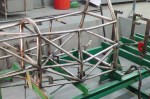
- Main roll hoop brace extensions in place. These are required by SCCA rules to be a minimum of 1″ diameter and 2 mm thickness.
-

- Two upper rear diagonal tubes in place
-

- Daughter Senna (yes, that’s her real name) tries out the driving position, reports that it “needs work.”

Congratulations for your project!!
Really nice looking car!
And really good design!!
Thanks for the encouragement! Stay tuned!
-Jim
Hi, I’m Rhommell, I’m interested in your project & would like to get your contact details…
Please do send me a mail..
Thanks. I’ll send you a private email.
-Jim